Showing posts with label Nails. Show all posts

7.28.2012

Nailed It!: Simple Florals

Like many girls on the go, I don't really have the time to mull over and to spend so much time  in some of the littlest tasks, such as doing my nails. I usually get a professional manicure nowadays. I realized that it's so much better that way since all bases are covered. I prefer to have them cleaned, shaped, and buffed, with no polish added. I now do my nail design at home. I revived some of my old polishes with some solvent. That way, I don't have to shell out more for new ones. Read more about my tips for keeping your tips in tip-top shape, while being on a budget HERE.

When I do have time (and no budget at all for luxuries like a mani-pedi), I do my own everything. Anyway, since I gravitate towards shiny objects and cheap thrills, I have this new-found fascination for collecting nail art stickers. You've probably seen my previous entry and my first ever trial in nail "art." If you haven't yet, you can read about it HERE!

Now that we're done moving in to my new apartment in the city (it was the least glamorous day of my life!), I can somehow rest easy and manage to have maarte nails now that all the lifting, the assembly of furniture, the cleaning, the washing, all the painful chores included in moving out of the home and into a new one, are done. Consider it as a post-macho moment reward to myself. I'm proud of  me and my mom! We did it! We managed to put some elbow grease into it and turned an otherwise blah studio-type apartment into a habitable and humble abode.

Anywaaaaaaaay! About the nails! Yes. I am a beginner, a newbie, a mere enthusiast at this point, but I'm so happy that I was able to come up with a design all my own.


Please pardon the wrinkly hands. Bleach doesn't really fare well with my skin at all. Must be from all that cleaning business earlier. :( Note to self: You have hand cream lying around, use it. Haha!

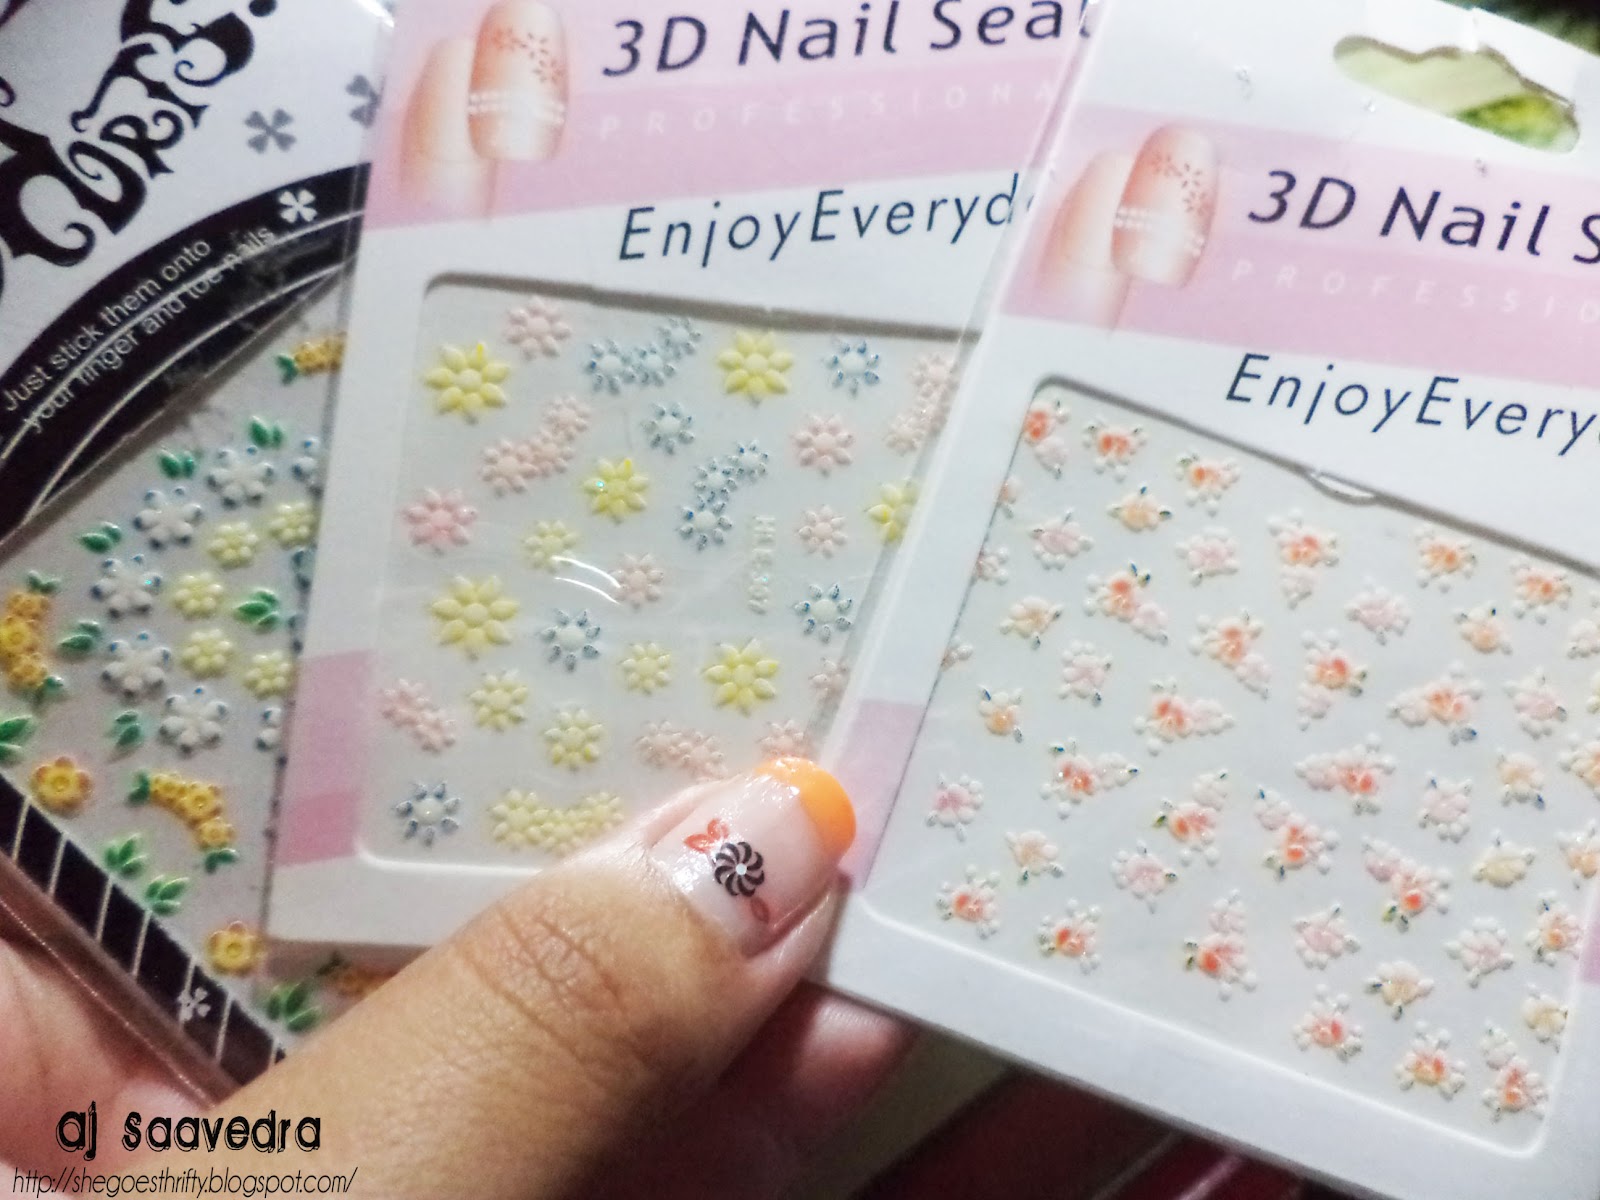
And hey, check out this cool find! I got an entire sheet of nail art stickers with varied designs, all for only Php 26 ($0.50)! Snagged it from a local Divisoria-esque department store in my hometown. I'll definitely make use of these pretty soon!


Stickers are a quick and easy way to update your digits and to keep them from looking oh-so-boring! Jazz 'em up with 3D stickers for an edgier look, with glittered ones for that extra-cute factor, or some simple ones like what I used above for a more classic but equally pretty over-all appeal. :)

Love,
SGT <3

7.08.2012

Nailed It!

Nail art done professionally can get pretty expensive. I discovered a few tips and tricks to cut your costs on those luxurious nail-painting appointments. All you need is resourcefulness, dexterity (which I don't have yet, but I'm working on it), and creativity. :)

  1. If you have old, unfinished nail polish bottles lying around the house, don't lose hope yet. You can bring them back to life with the help of solvent. You can buy a bottle of this substance in Watson's or any other department store or supermarket. I use the Caronia brand. What it basically does is it thins out clumped polishes and helps remove other nail implements. Just pour a minute drop or two into your nail polish bottle, close the cap, and shake the bottle to submission. Please don't sniff it as the smell can get addictive. (Php 31.50) 
  2. Invest in a great base and top coat polish. Well, you don't really have to sell your organs to afford one. Caronia has a good top coat (Php 44.25) that's widely available, plus, it's fast-dry too! For my base coat, I rely on Etude House -- a bottle cost me around Php 48. I also use this kwik-dry thing that I put on my cuticles after I finished painting my nails to help the polish dry faster. Saw this technique whenever I went in for professional manicures and pedicures. Mine's from Bobbie. Again, these are department store/supermarket/drug store brands. Easy accessibility. :)
  3. There are a wide variety of options for nail art stuff. You can go with decals, stickers, stick-on jewels, fimo sticks, artificial nails, nail art pens and tools, and so much more! Jazz up your digits in more ways than one! The price range varies from 10 pesos to infinity! Hehe. It really depends on what you're more comfortable using. If you're a DIY nail art newbie like me, I suggest you start off with nail stickers, as they can be the easiest ones to apply/use. Watsons shelves have them. You can also check out your nearest Hortaleza branch. They're available online as well. (If you know where else to get them, please comment down below, thanks!) Just search for them on Multiply. :) For how-to tutorials, please check out Youtube, as many nail art gurus posted helpful videos on the matter. I've been dying to try the ombre and this marble thing I saw on Youtube once -- maybe not now. Perhaps when I've gained much confidence and when my crabby hands decide to hold steady long enough for me to finish an entire hand.
  4. Invest in a really good mani/pedi set and DIY mani-pedi yourself, or have your nails cleaned and buffed professionally, if you're more comfortable with that. Usually, cleaning, shaping, and buffing (without the polish/nail art) cost less. You can work on the nail art design at home. Tutorials on how to do your own nails are all over Youtube as well.
  5. Fear not! The first couple of tries won't be perfect (check out my crappy right hand nail art -- or something like it), but over time, you'll get the hang of it and you'll be more comfortable with doing it yourself. It really takes a lot of dexterity to get the design dead-on. Start with simple designs, such as this French Tip-esque neon orange style. I just added on a few floral nail stickers to make things more interesting. I'm pretty happy with the outcome. Not bad for a first-timer, eh? :)
  6. Look for nail art inspirations online. Tumblr and Pinterest can help narrow down your search, but then again, there's always Google to rely on in times of need.
  7. Just go for it! It will take a lot of patience, practice, and polish to get you going on this DIY nail art business. :)) I'm only beginning to reap the benefits of DIY nail art because at the end of the day, I can do whatever I want with my nails and I don't have to spend a fortune while I'm at it! Plus, they look really cute and different! I hope to try out more techniques really soon. :)

Left hand
Used an old bottle of neon orange nail polish and some nail stickers.
Crappy right hand here. :)) sorry. Not ambidextrous!

Got these cute nail stickers from Pacita Complex (a market place a town away) today. Each sheet costs Php 10. Can you believe it?!


These ones are from Watsons. Got them the other day for Php 15 per sheet. I have them on my nails right now. :)


Hope these tips help! Feel free to post your DIY nail art projects on She Goes Thrifty's Facebook page. Share with me and everyone else your masterpiece. Let's get inspired together! :)

Love,
SGT <3

7.03.2012

Nails and Notes

Hello! As you may have seen in my last entry, my mint-green nails have already chipped. That meant it's time for a fresh layer of polish! Check out what I did in between making my presentations. I have a job interview tomorrow and I want to look presentable. Chipped nails just won't cut it! As for these notes you see on the background, they're for my part-time job. :)

Base and Glitter Polish: Etude House
Clear Polish and Kwik Dry: Bobbie

Please pardon the poor quality of the shots. I used my phone to take these. 

Don't you just love glitter nails? :)


Love,
SGT <3

3.01.2012

Hot Fuss: Polish and Strip

Nail salons are sprouting up anywhere and everywhere. The market is hotter than ever. More and more women  find time to pamper themselves after a hard day's work. If you're one of them and you don't have the time to travel all the way to Manila (especially for Southside girls like myself), there's one in Santa Rosa City (hometown, baby! Represent!) that you'll definitely want to check out. You'll not only save up on gas and toll fees, but you'll also save a lot because of their super budget-friendly prices.

I'm talking about Polish & Strip. It's a quaint little place just outside the South Hampton Village in Santa Rosa City, Laguna. It's actually very accessible if you're coming in from anywhere in Santa Rosa, Cabuyao, or Binan. You can find it along the RSBS Road (at least I think that's what it's called), just before reaching Enchanted Kingdom (if you don't know where it is, you're probably screwed, kidding!). Anyway, here's a quick tutorial on how to get there:

  • Take the Santa Rosa exit (if you must take the SLEX)
  • If you're coming from Manila (southbound), upon exit from the toll gate, take a right. Going left means you're headed for Paseo, Nuvali, and eventually Tagaytay.
  • If you're coming from Calamba / Batangas (northbound), upon exit from the toll gate, take a right. 
  • Just go straight. When you reach Waltermart, turn right (going to Enchanted Kingdom), then, just go straight.
  • Polish & Strip is on the right side of the road, just before you reach EK. There are lots of parking spaces just outside the salon so you won't have to worry about parking. If you're commuting, tricycles in Waltermart can take you there. Just tell the driver to drop you off at South Hampton.

The first thing I noticed, the exterior of the salon is very simple, quite unassuming, unlike other nail salons that really welcome their clients with color and decor. I've been wanting to try out their services, I just never found the time to do it. See, I'm quite keen on having my nails done. Over the years, I've had bad experiences with salons and nail technicians that have either murderers in their middle name or charge way too much for their services. I can assure you, She Goes Thrifty is always in the look-out for great deals and magnificent services that will surely fit your budget (and mine too!). Besides, who can afford to pay for a 1000-peso mani/pedi when you can have basically the same thing done (probably even better!) for less than Php 300? Other nail salons even have hidden surcharges when you choose high-end nail polish for your digits; some even fail to observe excellence in their services despite their sky-high prices. That's why Polish & Strip impressed me in more ways than I initially expected.

Photo borrowed from their Facebook fan page.

Now that's done, let's move on to the good part - the review!


Finally, I found the chance to swing by this newly-opened nail salon. According to the owner, they just turned 1 month old. It's right outside our village, so that's definitely a plus. I won't have to drive far and long to have my nails done. They're basically right outside our door step!

Anyway, I noticed as soon as I stepped in the salon, that they really maxed out on colors! The first thing that caught my eye was this chandelier. (Please pardon the not-so-good quality of the pictures. I took these with my Blackberry phone cam)

Pink is the new pink! Every girl has got to love pink one way or another. :)
This chandelier made me want to feel pretty and pampered. Teehee!
What'd I tell you about the colors? Lounge seating for everyone!
You'll definitely feel like a princess.

That's the owner (forgot to ask her name) in the reception booth.
She was very nice, accommodating, and pretty, too!
There are lots of colors to choose from!
Paint your digits all you want. Polish & Strip uses only Orly nail polish, even the top and base coats, sans the extra charge. Your mani/pedi will definitely last longer and won't chip in two days. That's value for money right there.

A close-up on the lounge seats.
There's really something for everyone!
Go crazy! With so much to choose from, you'll want to come back regularly for touch-ups
or for color change!

I'm digging the mint green wall. Definitely soothes and calms nerves.
Girly art. It's so perky, this place!
In addition to the signature nail treatment that I availed, I got a hand and foot massage, plus this wrap that's really relaxing. Yup, you got it. All that for only Php 300 (~ $7)! Their staff is very friendly and courteous. I remember Ate Chel (my therapist) said "Excuse me." more times than I can remember. But really, the service is great.

My first time for a warm wrap. They also did it to my hands. There's also a soak and a massage.
You're not only getting cleaner and well-kept nails, you're also getting the complete
pampering experience! Please pardon my man-like muscular legs.
Love, love, love my hot pink nails... and for my toesies, a pale pink color. :)
They're open from 9 AM to 9PM. Aside from their Signature Mani-Pedi, they also offer services such as:

  • MAN-cure (for male clients)
  • Petit Treatment (for the kiddos!)
  • Signature Foot Spa/Scrub
  • Foot Reflexology
  • Hand Spa (optional: with paraffin treatment)
  • Nail Art
  • Waxing
  • Eyelash Perming
  • And so much more!
For more information and for reservations, you can go to their Facebook page (just click on the links above) or you can contact 0933-9861731 or 0928-9454394.

Despite their newbie status in the field of nail care, I am very much a satisfied customer. I'll definitely recommend this place for its quality and affordable pampering. If you happen to live in or near Santa Rosa, do drop by Polish & Strip. I assure you, you will feel beautiful, invigorated, refreshed, and ready more than ever to take on the world. You're a woman who's polished and ready to strip down every worry that hinders you from achieving your stellar potential!

Love,
SGT <3